Power Wheels Assembly Tips: How to Put It Together Without Losing Your Mind
Assembly tips for Power Wheels and ride-on cars — common mistakes, tools you actually need, and the parts that always cause problems. A practical guide for 11pm Christmas Eve assembly.
Affiliate Disclosure
This page contains affiliate links. As an Amazon Associate, PowerWheels HQ may earn a commission on qualifying purchases at no extra cost to you. Our reviews and recommendations are editorially independent.
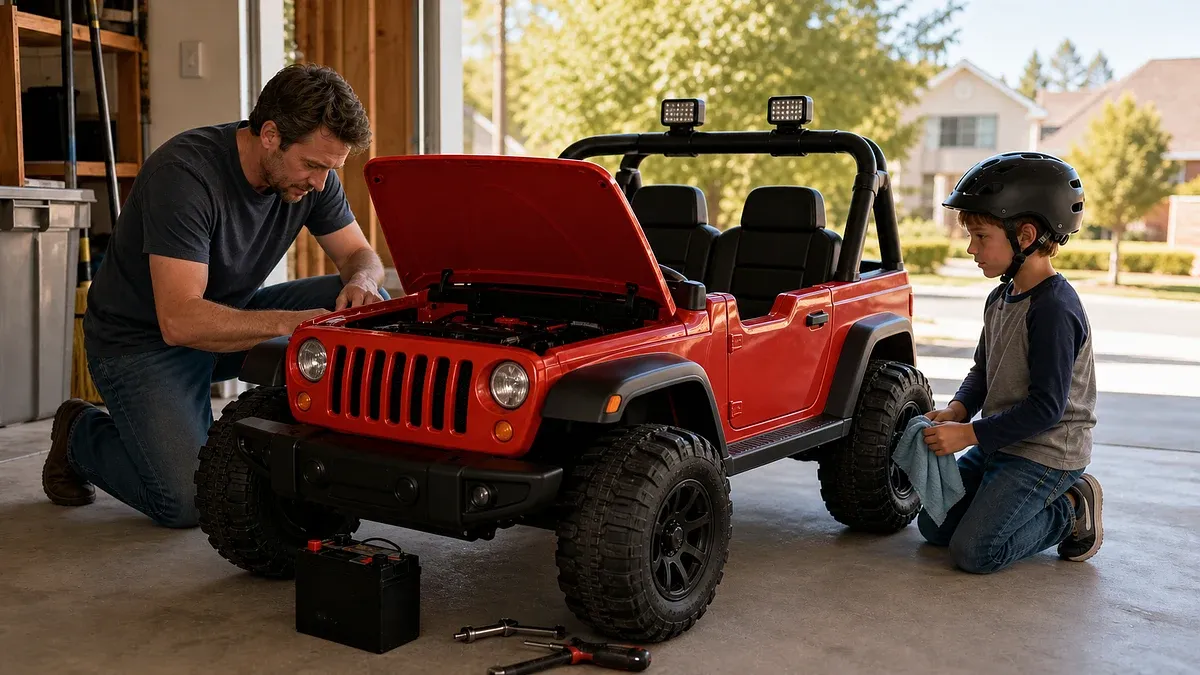
It's 11pm. The box has been open for 45 minutes. There are 47 parts laid out on the living room floor, the instructions are a 12-page diagram where step 6 appears to contradict step 4, and you're not entirely sure which of the three sizes of screws you've been using for the last 20 minutes is the right one.
Welcome to ride-on car assembly. It doesn't have to be this bad.
Most of the pain in ride-on assembly comes from three things: not reading ahead, overtightening screws before the structure is fully together, and missing the "charge the battery first" instruction that's buried on page 3 in 6-point font. Solve those three problems and you cut assembly time in half.
Before You Open Anything
Start the battery charging before you assemble anything. This is the most universally missed step in ride-on car assembly. The battery needs 14–18 hours to reach a full charge from new. If you open the box on Christmas morning and hand your child a fully assembled ride-on at 10am, it needs to have been charging since the previous evening. New batteries from the factory are never at full charge.
Charge first, assemble second. Or assemble while it charges. But the battery goes in the charger before anything else.
The Tools That Actually Matter
The instructions will tell you a screwdriver is sufficient. They are technically correct and practically wrong. Here's what you actually want:
A cordless drill/driver with a clutch is the difference between 45 minutes and 2.5 hours of assembly. Setting the clutch to stop before overtightening protects the plastic bosses that screws thread into. Manual screwdrivers on 60+ screws cause hand fatigue, uneven tightening, and a miserable experience.
A Phillips #2 bit for most screws, and a Phillips #1 for the smaller body panel screws. Having both saves the frustration of trying to drive a #1 screw with a #2 bit and stripping the head.
A rubber mallet for press-fit connections. Wheel hubs and body panels often have press-fit plastic snaps that require more force than finger pressure but less than hammer force. A rubber mallet gives you control.
Needle-nose pliers for pulling connector pins through tight spaces.
Read the Instructions Completely Before You Start
This takes 10 minutes and prevents 45 minutes of backtracking. Specifically: look for the sequence of body panel installation (they almost always have a specific order that prevents you from losing access to a screw hole), note which screws go where before you mix them up, and find the electrical connections that need to be made before certain panels close them off.
The most common assembly error is installing a body panel and then realizing there's a connector that needed to pass through a gap in that panel before it was installed. You then spend 20 minutes partially disassembling what you just assembled.
The Steps That Always Go Wrong
Steering column attachment: The steering wheel and column assembly on most ride-ons requires a specific order of operations that the instructions describe poorly. In general: attach the steering shaft to the front axle steering tie rod first, then secure the column to the body, then attach the wheel to the column. Doing it in a different order usually means one of the connections is inaccessible once another part is in place.
Seat bolts: The seat bolts on most Power Wheels and similar ride-ons are accessed through the battery compartment below the seat. Counterintuitively, the seat goes in last — after the battery connection is made. Instructions sometimes show this correctly and sometimes don't.
Wheel nuts: Most ride-on wheels use a nut that threads onto a bolt in the axle. Hand-tighten first to verify alignment, then tighten with a wrench. Don't overtighten — plastic axle threads strip easily and a stripped axle nut means the wheel wobbles. "Snug plus a quarter turn" is the right torque.
The Electrical Connection Nobody Notices Until It's Too Late
Almost every ride-on car comes with the main battery harness disconnected for shipping safety. The battery connector inside the chassis needs to be plugged in before the vehicle will operate. On some models this is obvious — the connector is right next to the battery tray. On others it's tucked up under the body.
If you've assembled the vehicle, charged the battery, installed the battery, and it still doesn't power on — check this connector first. 30% of "the car doesn't work" calls to Power Wheels customer service are this connector.
Overtightening: The Most Common Damage
Ride-on toys use plastic bodies with molded-in or threaded steel inserts for screw connections. The plastic around these inserts cracks under excessive torque. Once it's cracked, the screw no longer holds — the panel wobbles or falls off.
Use a drill driver with the clutch set low (setting 3–5 on a 10-setting clutch). When the clutch clicks, stop. Don't override the clutch. Don't go back and "just give it a little more." The clutch is telling you the screw is tight enough.
If you're using a manual screwdriver, stop when you feel firm resistance. The plastic is tighter than you think.
After Assembly: The Pre-Use Check
Before your child's first ride:
Verify all body panel clips are snapped in — panels that are slightly unclipped can pop off during use and become a tripping hazard.
Test forward, reverse, and steering at low speed before high speed — confirm everything operates correctly.
Check that the parental remote (if included) is paired and overrides the vehicle correctly.
Make sure the battery harness connector is fully seated and not rubbing against any moving parts.
Quick Comparison
BLACK+DECKER 20V MAX Drill Driver
BLACK+DECKER
Most important assembly tool — with adjustable clutch
- Voltage
- N/A
- Seats
- N/A
- Ages
- N/A
- Price
- $50-$80
Stanley 6-Piece Screwdriver Set
Stanley
Manual screwdrivers for the detail work
- Voltage
- N/A
- Seats
- N/A
- Ages
- N/A
- Price
- $15-$25
Vaughan 12oz Rubber Mallet
Vaughan
Press-fit panel clips and wheel hubs
- Voltage
- N/A
- Seats
- N/A
- Ages
- N/A
- Price
- $12-$20
TEKTON Needle Nose Pliers
TEKTON
Routing electrical connectors through panels
- Voltage
- N/A
- Seats
- N/A
- Ages
- N/A
- Price
- $10-$18
Power Wheels 12V Battery Charger
Power Wheels
Starting the charge before assembly begins
- Voltage
- 12V
- Seats
- N/A
- Ages
- N/A
- Price
- $20-$35
| Product | Best For | Specs | Price | Rating |
|---|---|---|---|---|
BLACK+DECKER 20V MAX Drill Driver BLACK+DECKER | Most important assembly tool — with adjustable clutch | N/A · N/A seats Ages N/A | $50-$80 | 4.5 |
Stanley 6-Piece Screwdriver Set Stanley | Manual screwdrivers for the detail work | N/A · N/A seats Ages N/A | $15-$25 | 4.4 |
Vaughan 12oz Rubber Mallet Vaughan | Press-fit panel clips and wheel hubs | N/A · N/A seats Ages N/A | $12-$20 | 4.6 |
TEKTON Needle Nose Pliers TEKTON | Routing electrical connectors through panels | N/A · N/A seats Ages N/A | $10-$18 | 4.5 |
Power Wheels 12V Battery Charger Power Wheels | Starting the charge before assembly begins | 12V · N/A seats Ages N/A | $20-$35 | 3.9 |
Prices are approximate and subject to change. Always verify current pricing before purchasing.
Our Picks — In Detail
BLACK+DECKER 20V MAX Drill Driver
BLACK+DECKER
N/ASeats
N/AAges
N/APrice
$50-$80
A drill driver with adjustable clutch is the most important tool for ride-on assembly. Set the clutch to avoid overtightening plastic mounts — the tool stops automatically at the right torque. Cuts assembly time by more than half compared to manual screwdrivers.
Pros
- Clutch prevents overtightening plastic
- Dramatically faster than manual screwdrivers
- Useful for years of household tasks
Cons
- Overkill purchase if you already have a drill
- Cost can exceed the value if you're only assembling one toy
Stanley 6-Piece Screwdriver Set
Stanley
N/ASeats
N/AAges
N/APrice
$15-$25
Even with a drill, you'll need a Phillips #1 and #2 manual screwdriver for tight spaces and detail connections. A basic set covers both sizes. The Phillips #2 does 80% of the work; the #1 handles the small body panel screws.
Pros
- Right sizes for all ride-on assembly screws
- Inexpensive
- Useful beyond assembly day
Cons
- Manual work is slow for the main structural screws
- Easy to overtighten without a clutch
Vaughan 12oz Rubber Mallet
Vaughan
N/ASeats
N/AAges
N/APrice
$12-$20
Press-fit plastic connections on ride-on toys need more force than fingers but less than a hammer. A rubber mallet lets you control the impact without cracking the plastic. Essential for wheel hub installation on many models.
Pros
- Won't crack plastic like a metal hammer
- Good control on press-fit connections
- Inexpensive
Cons
- Not useful for screw-based assembly
- Easy to overdo it if you use a full swing
TEKTON Needle Nose Pliers
TEKTON
N/ASeats
N/AAges
N/APrice
$10-$18
Electrical harness connectors in ride-on cars often need to be routed through tight gaps in the body panels. Needle-nose pliers let you grab and guide connectors without skinning your knuckles against the plastic. More useful than you'd expect.
Pros
- Essential for electrical harness routing
- Inexpensive
- General household utility
Cons
- Not needed on every model
- Easy to substitute with other long-reach tools
Power Wheels 12V Battery Charger
Power Wheels
12VSeats
N/AAges
N/APrice
$20-$35
Keep a spare charger on hand if you have multiple ride-on vehicles. The OEM charger that ships with the vehicle often needs to be accessed through the battery compartment — having a second charger means you can start charging during unboxing while keeping the primary charger accessible.
Pros
- OEM compatibility
- Inexpensive insurance against charger failure
- Enables pre-assembly charging without delay
Cons
- Not an upgrade over the included charger
- Basic design without smart features
What to Look For
Voltage (6V / 12V / 24V)
Higher voltage means more power, higher top speed, and better terrain handling. Choose based on your child's age, size, and where they'll ride. 12V is the most popular choice for ages 3–7.
Number of Seats
Single-seat models work for one child; two-seat designs are great for siblings or friends. Two-seaters often put more strain on the motor, so look for adequate power.
Terrain
Most 12V ride-ons handle flat grass and hard surfaces. If you have hills, rough grass, or gravel, look for 24V models with high-traction tires.
Safety Features
Look for seat belts, parental lockout switches, low/high speed settings, and parental remote controls — especially for younger or first-time riders.
Battery & Charging
Check battery life (usually 1–2 hours for 12V) and charge time (8–18 hours). Some premium models offer faster charging or higher-capacity batteries.